To install the NetStores FrontPage E-Commerce add-ins, download
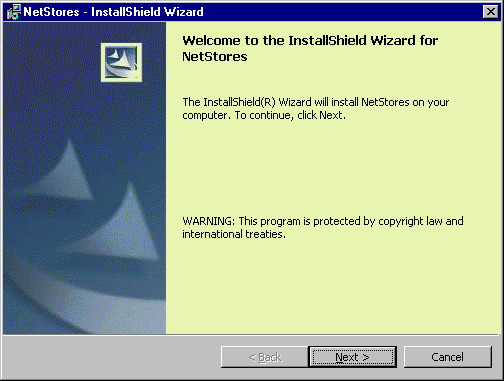
the add-ins from frontpage.netstores.com. Then double click or run the download file. When the installer has started, it will look like the following image. Follow the installer's prompts to install the NetStores FrontPage E-Commerce add-ins.

This will install the add-in to the 'C:\Program Files\NetStores\' directory.
Next, run FrontPage and choose Tools > Add-Ins from the menu.
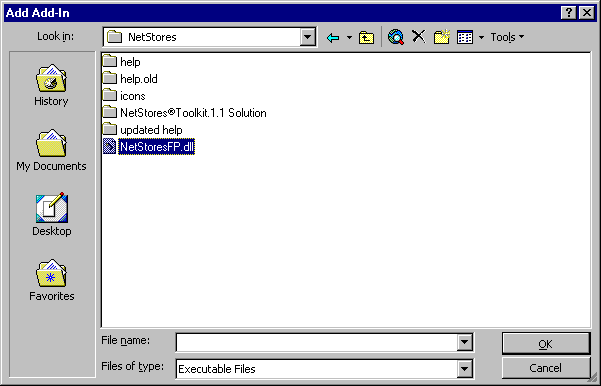
Click on 'Add', Browse to the 'C:\Program Files\NetStores\' directory, and select 'NetStoresFP.dll' (see image below), click 'OK' to close the 'Add Add-In' dialog box, and then click 'OK' to close the 'COM Add-Ins' dialog box. 
The Menus in FrontPage will now be properly setup for your new NetStores FrontPage E-Commerce Add-Ins (NetStores E-Commerce should now be on the menu bar just after Help).
Un-Installation / Reinstallation
If you wish to remove the NetStores FrontPage E-Commerce Add-Ins, first remove it from FrontPage and then remove it from your system. First, run FrontPage and choose Tools > Add-Ins from the menu. Click on the 'NetStores E-Commerce Add-In' line on the left, click on 'Remove', and then click 'OK' to close the 'COM Add-Ins' dialog box. Now, exit from FrontPage to finish removing the add-in from the program. To remove the add-in from your system, use the Add/Remove Programs control in the the Control Panel (Select Start > Settings > Control Panel starting from the 'Start' menu button). Open the control, select "NetStores" from the program list, and then click the "Add/Remove" button.


